> ## Documentation Index
> Fetch the complete documentation index at: https://docs.gurubase.ai/llms.txt
> Use this file to discover all available pages before exploring further.
# Team Management
> Manage team members and user access for your Guru
Control who can access and modify your Guru by adding team members and managing their roles.
## Roles Overview
| Role | Permissions |
| ------------ | --------------------------------------------------------------------------------------------------------------- |
| **Owner** | Full control: manage settings, data sources, team members, and delete Guru |
| **Member** | Access and modify Guru content and data sources (full admin panel access) |
| **End User** | Ask questions only. Cannot access admin panel (Settings, Actions, Secrets, Integrations, Analytics, Team, etc.) |
The **End User** role is controlled via the built-in **End Users** group. Add
a team member to the End Users group to restrict them to question-asking only.
See [End Users Group](#end-users-group) below.
***
## Gurubase Cloud
### View Team Members
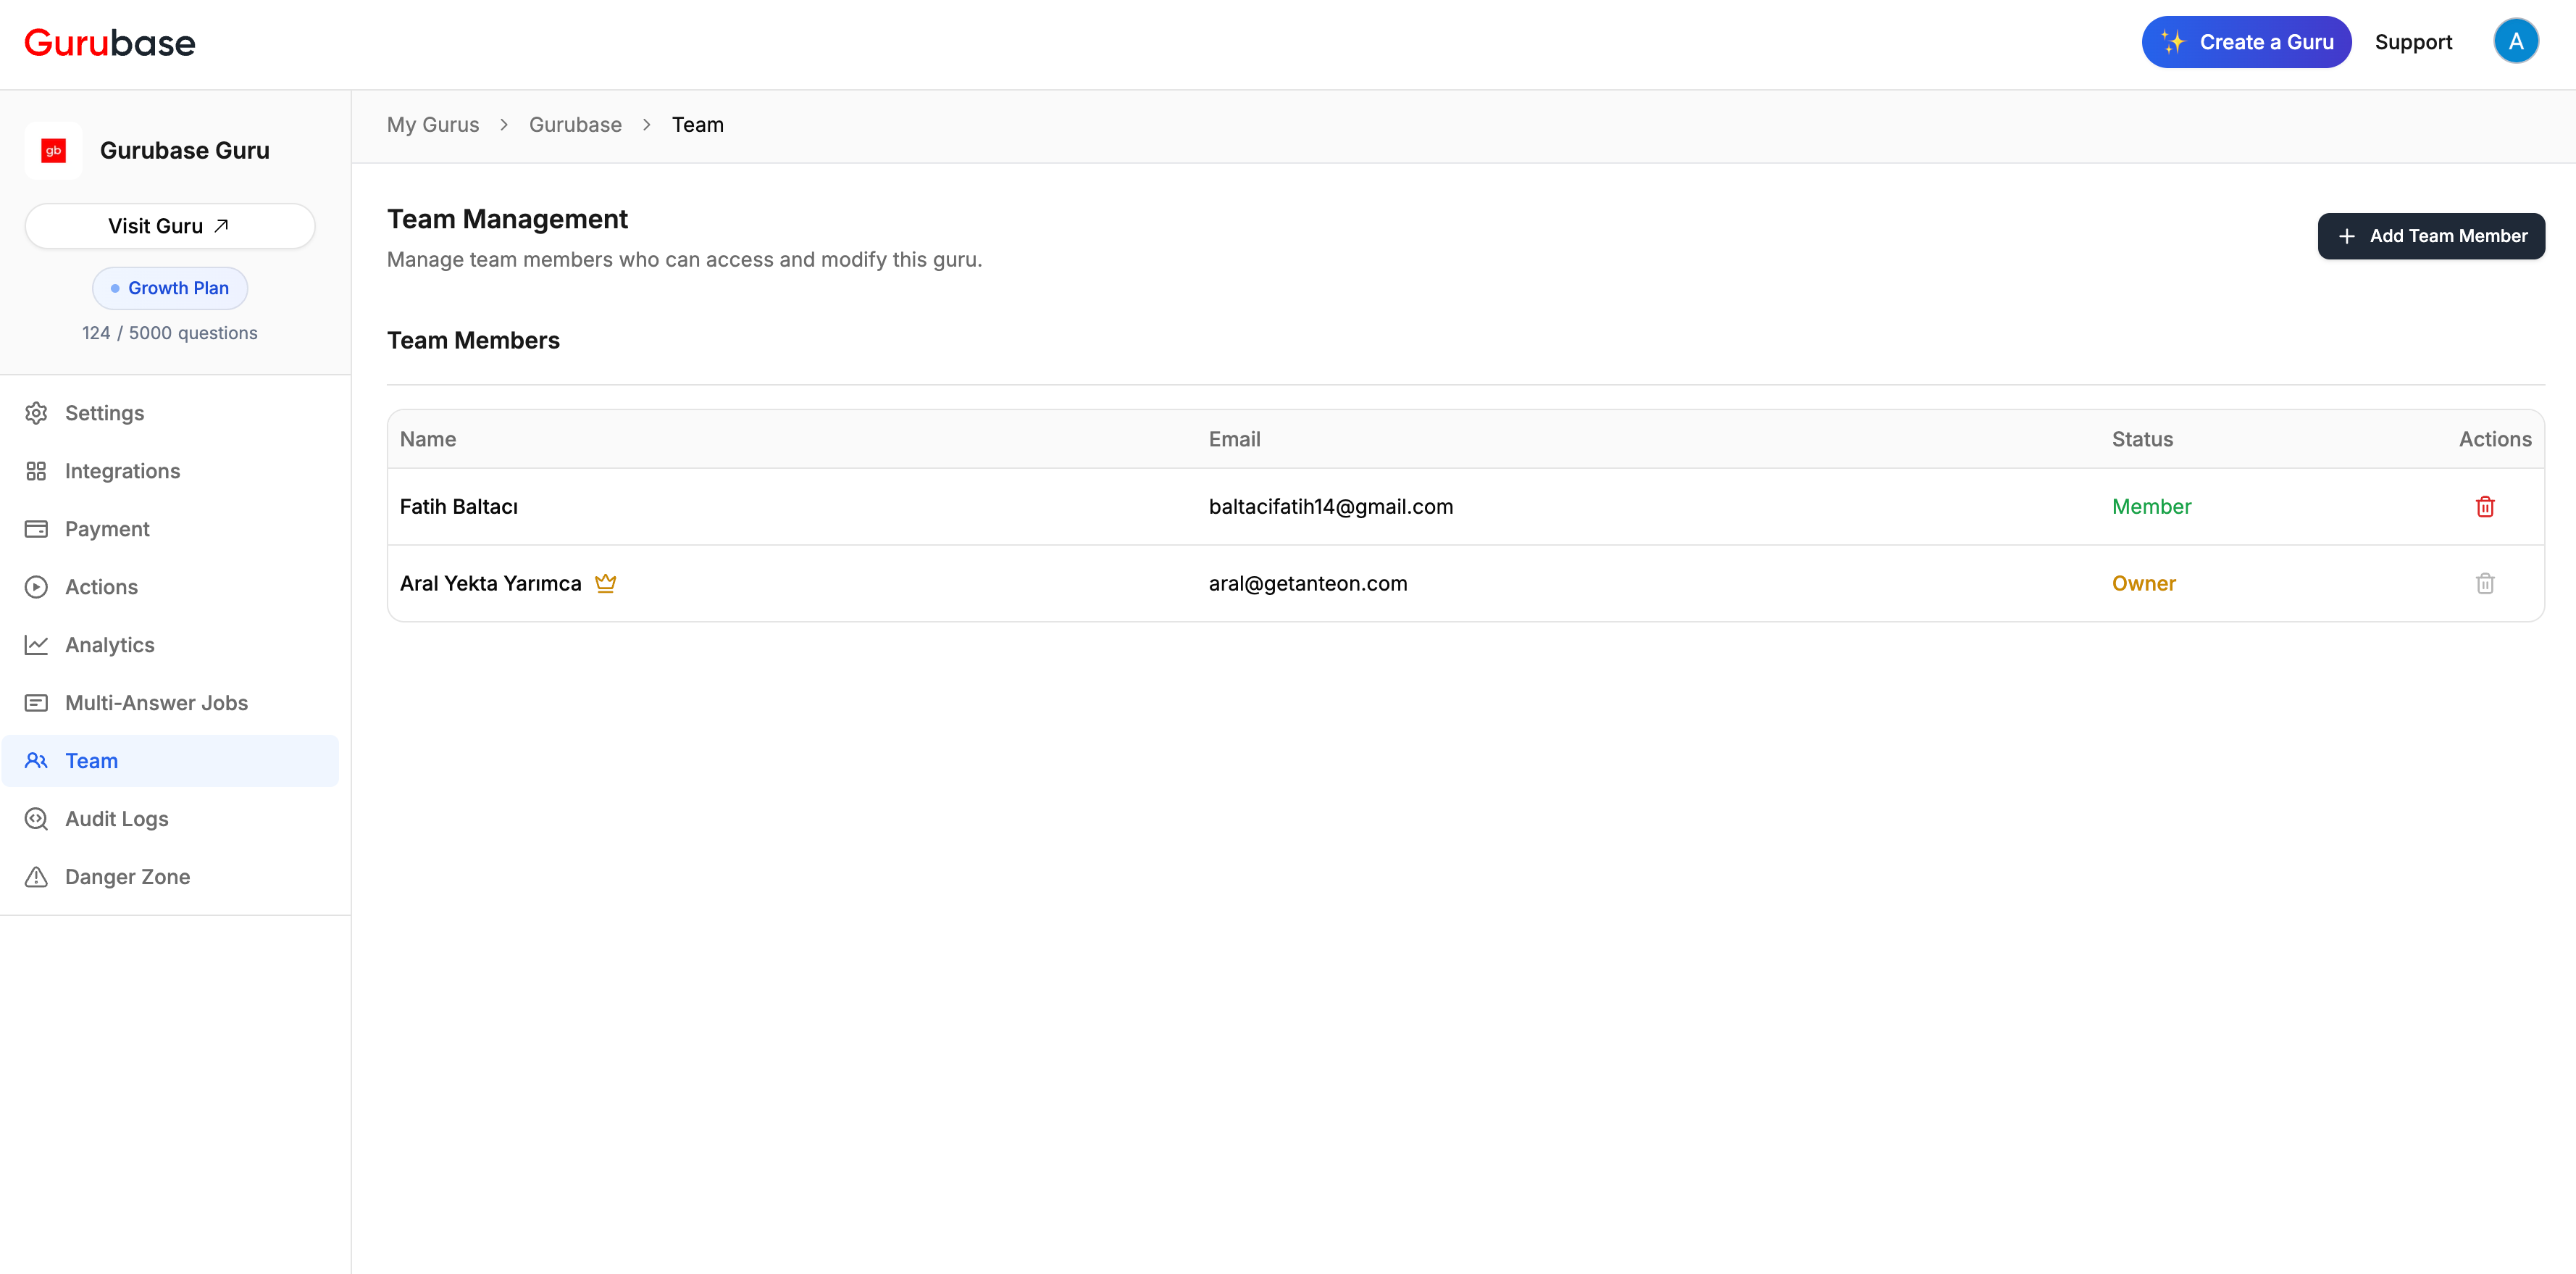 View all team members with their names, emails, and roles (Owner or Member).
### Add a Team Member
View all team members with their names, emails, and roles (Owner or Member).
### Add a Team Member
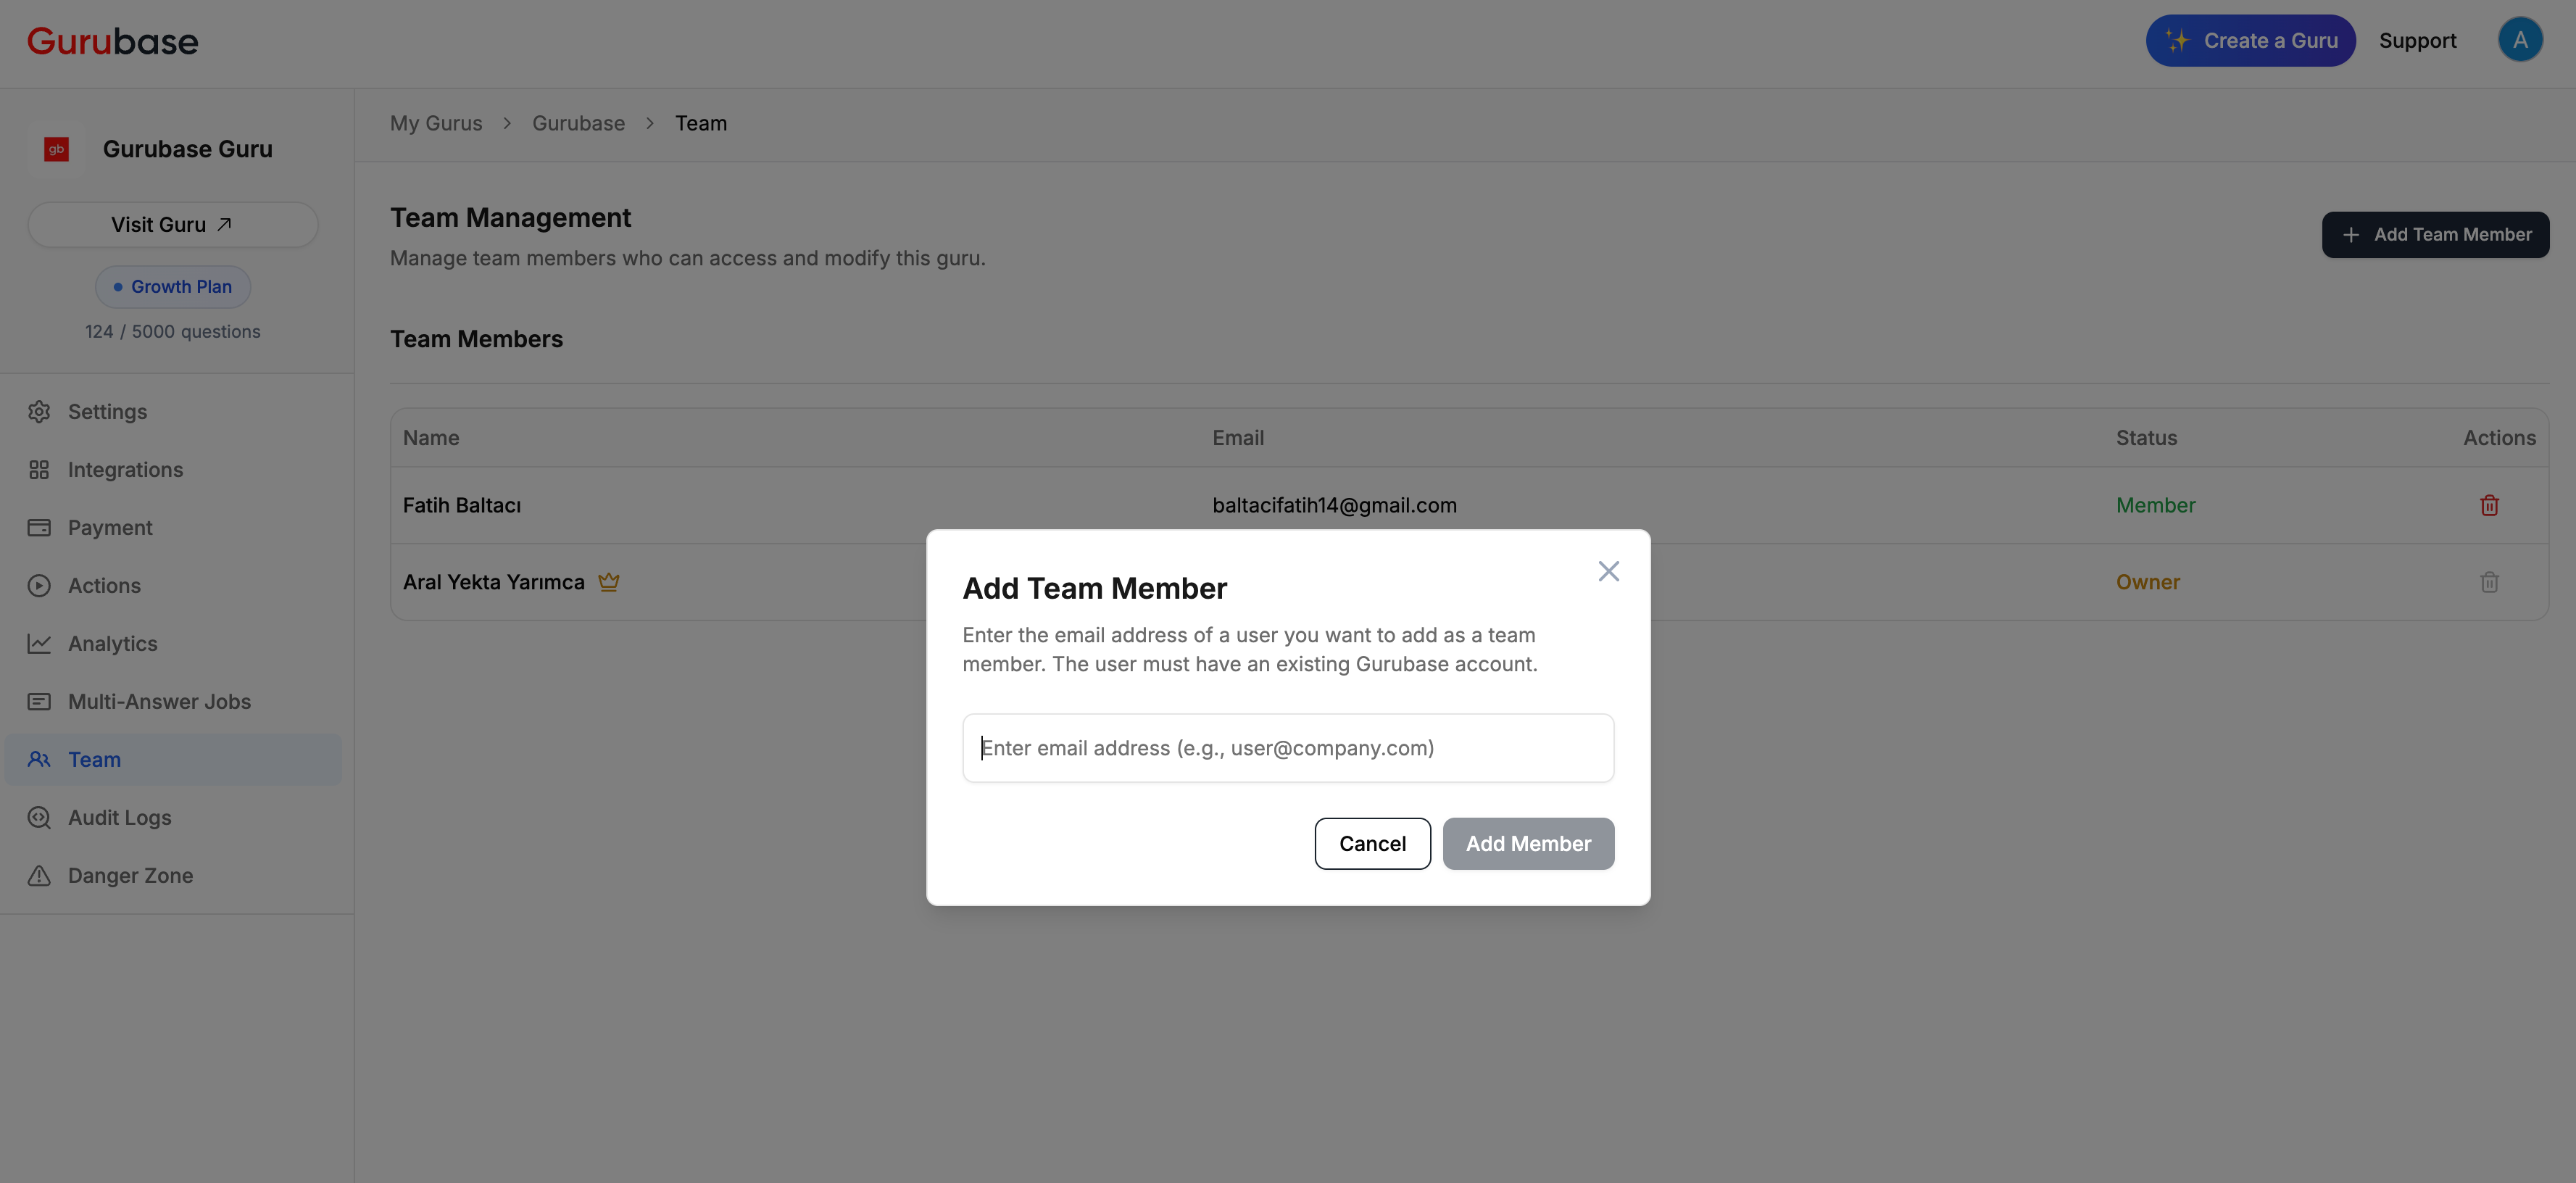 Go to your Guru's settings and click the **Team** tab.
Click **+ Add Team Member** and enter the email address.
The user must already have a Gurubase account to be added.
### End Users Group
Every Guru comes with a built-in **End Users** group. Team members added to this group
can only ask questions through the chat interface. They cannot access the admin panel
(Settings, Integrations, Actions, Secrets, Analytics, Team, Triage, MCP, or
Multi-Answer Jobs).
This is useful when you need to add users to a private Guru for Q\&A access without
giving them admin privileges. For example, in an enterprise scenario where employees
should ask the Guru questions but not modify its configuration.
Navigate to your Guru's **Team** page and click the **Groups** tab. The
**End Users** group is listed with a **Built-in** badge and cannot be
renamed or deleted.
Click the **Members** tab and use the **Groups** column to assign users to
the End Users group.
Sign in as an End User member. The admin sidebar should be empty and
navigating to any admin URL (e.g., `/guru/{slug}/settings`) will redirect to
the chat page.
The End Users group is a built-in group. It cannot be renamed or deleted. The
Owner always retains full admin access even if added to the End Users group.
End Users can also be assigned to other content groups (e.g., "Engineering", "Sales")
for data source visibility control. The End Users group only restricts admin panel
access; it does not affect which data sources the user can see when asking questions.
See [Groups & Content Access Control](/guides/groups) for details.
***
## Self-Hosted (Enterprise)
Self-hosted deployments have additional user management capabilities accessible from the **Settings** page.
### Roles
| Role | Scope | Permissions |
| --------------- | ------------- | -------------------------------------- |
| **Super Admin** | Platform-wide | Full access to all Gurus and settings |
| **Guru Admin** | Per Guru | Modify Guru configuration and settings |
| **Guru Viewer** | Per Guru | Can only ask questions |
### User Management
Go to your Guru's settings and click the **Team** tab.
Click **+ Add Team Member** and enter the email address.
The user must already have a Gurubase account to be added.
### End Users Group
Every Guru comes with a built-in **End Users** group. Team members added to this group
can only ask questions through the chat interface. They cannot access the admin panel
(Settings, Integrations, Actions, Secrets, Analytics, Team, Triage, MCP, or
Multi-Answer Jobs).
This is useful when you need to add users to a private Guru for Q\&A access without
giving them admin privileges. For example, in an enterprise scenario where employees
should ask the Guru questions but not modify its configuration.
Navigate to your Guru's **Team** page and click the **Groups** tab. The
**End Users** group is listed with a **Built-in** badge and cannot be
renamed or deleted.
Click the **Members** tab and use the **Groups** column to assign users to
the End Users group.
Sign in as an End User member. The admin sidebar should be empty and
navigating to any admin URL (e.g., `/guru/{slug}/settings`) will redirect to
the chat page.
The End Users group is a built-in group. It cannot be renamed or deleted. The
Owner always retains full admin access even if added to the End Users group.
End Users can also be assigned to other content groups (e.g., "Engineering", "Sales")
for data source visibility control. The End Users group only restricts admin panel
access; it does not affect which data sources the user can see when asking questions.
See [Groups & Content Access Control](/guides/groups) for details.
***
## Self-Hosted (Enterprise)
Self-hosted deployments have additional user management capabilities accessible from the **Settings** page.
### Roles
| Role | Scope | Permissions |
| --------------- | ------------- | -------------------------------------- |
| **Super Admin** | Platform-wide | Full access to all Gurus and settings |
| **Guru Admin** | Per Guru | Modify Guru configuration and settings |
| **Guru Viewer** | Per Guru | Can only ask questions |
### User Management
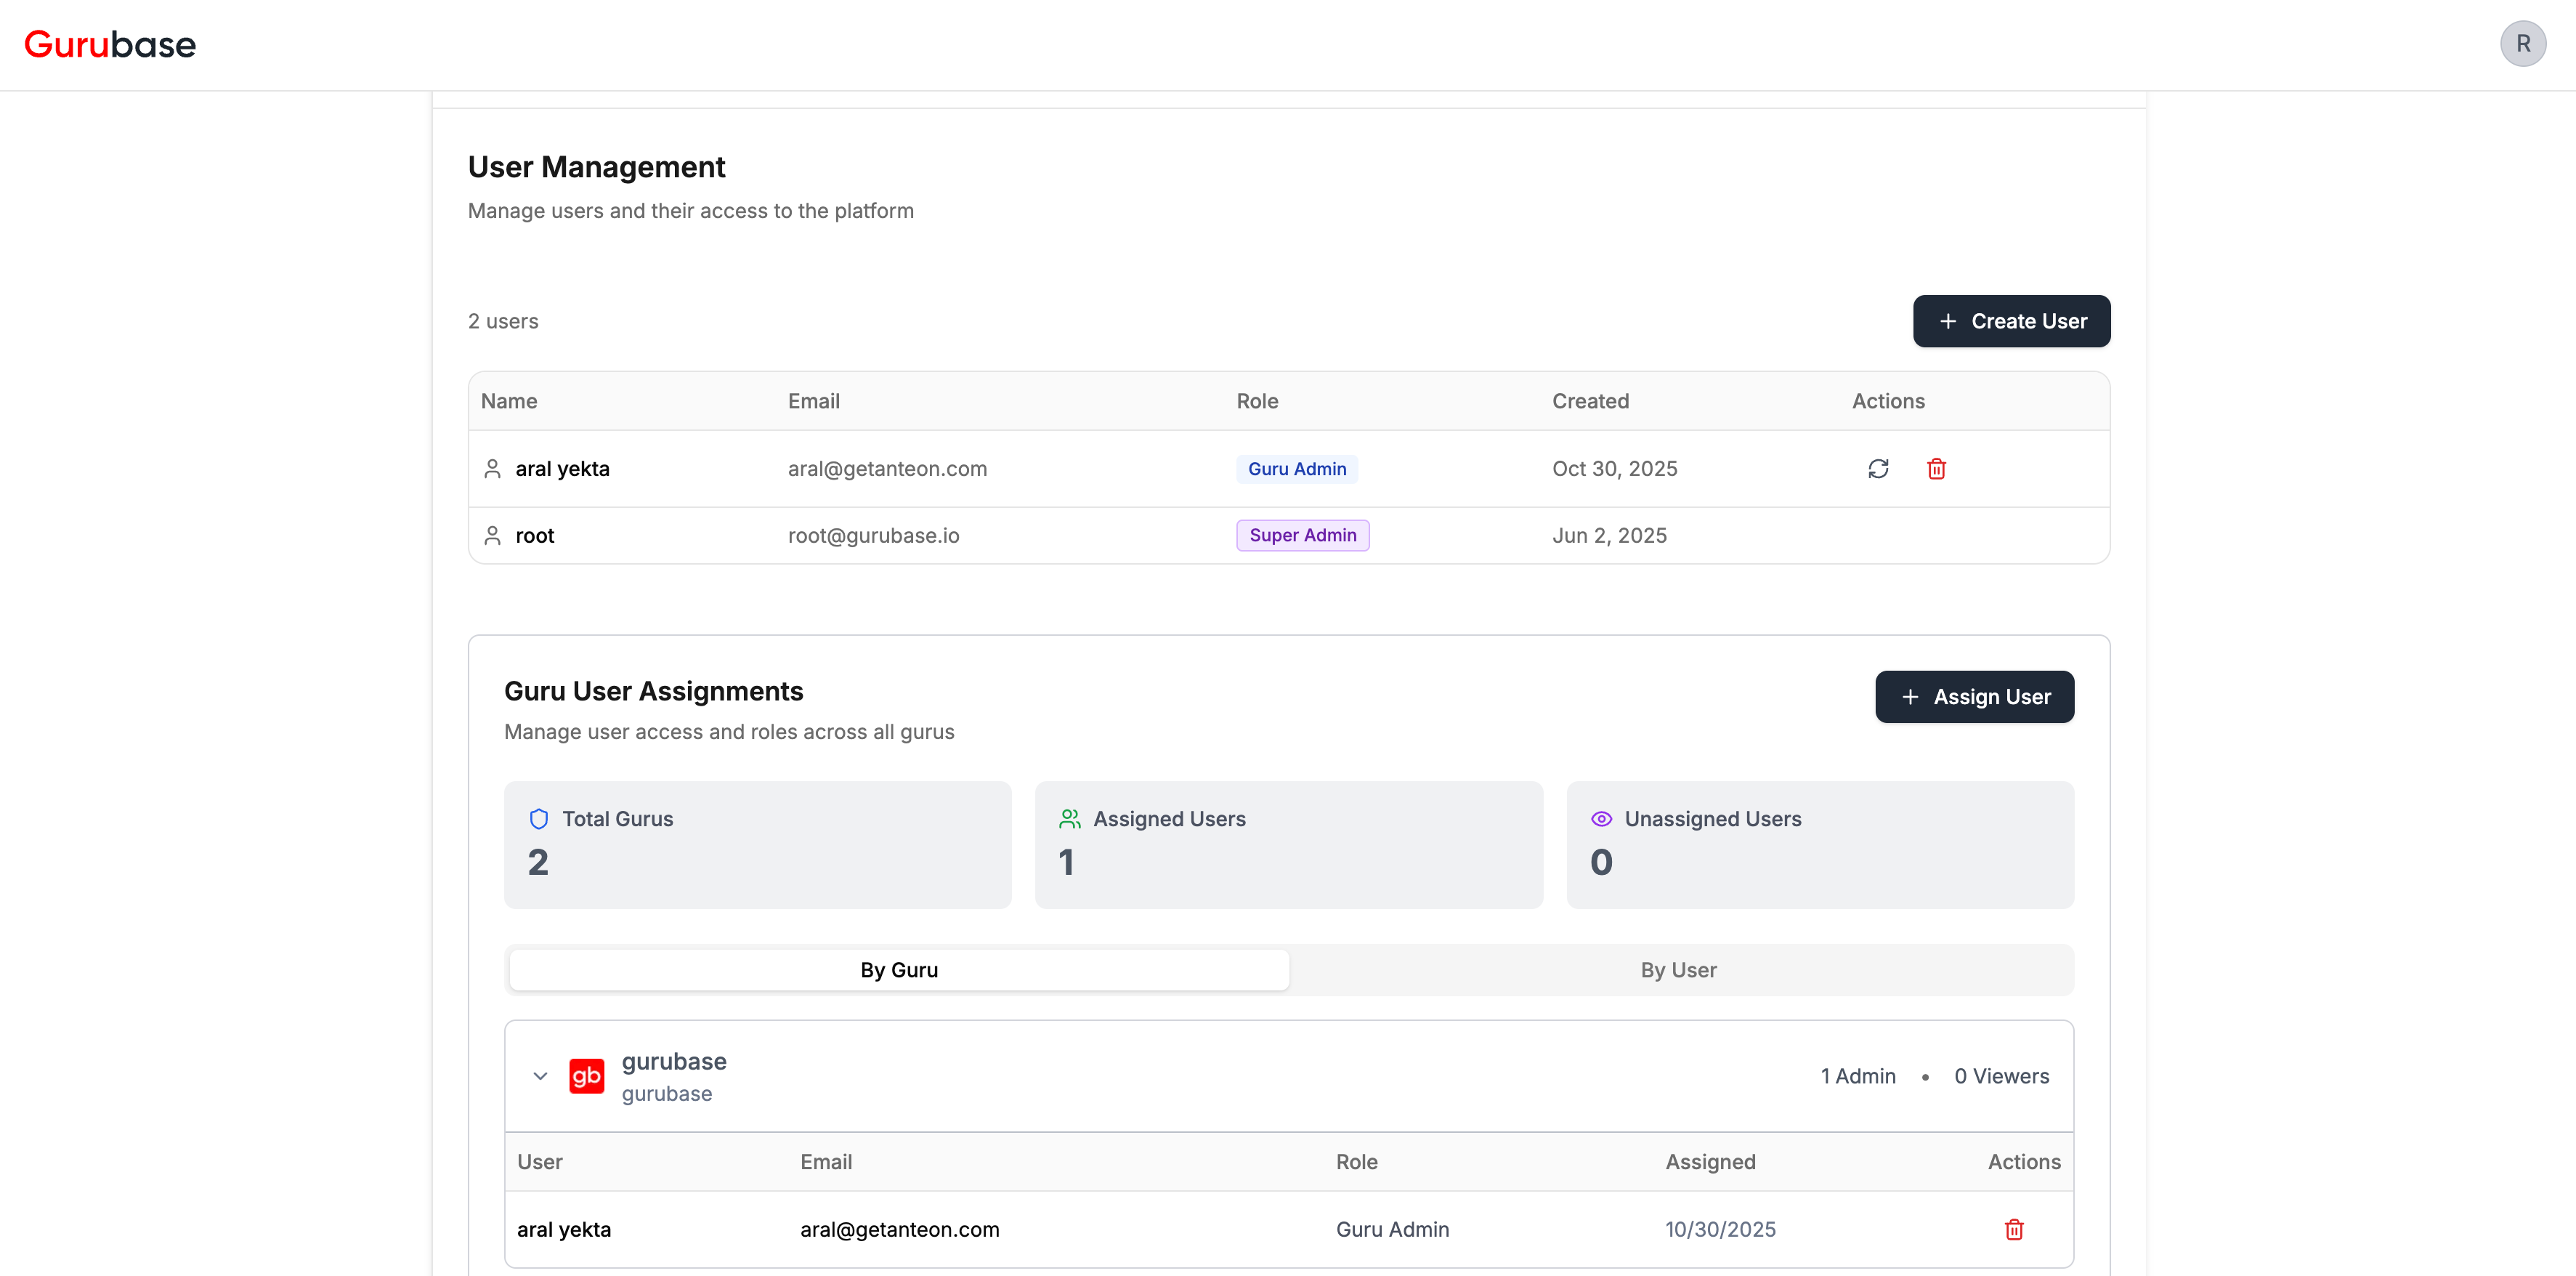 The User Management interface provides:
* **User Management** - List of all platform users with their roles
* **Guru User Assignments** - Manage which users have access to which Gurus
### Creating a User
The User Management interface provides:
* **User Management** - List of all platform users with their roles
* **Guru User Assignments** - Manage which users have access to which Gurus
### Creating a User
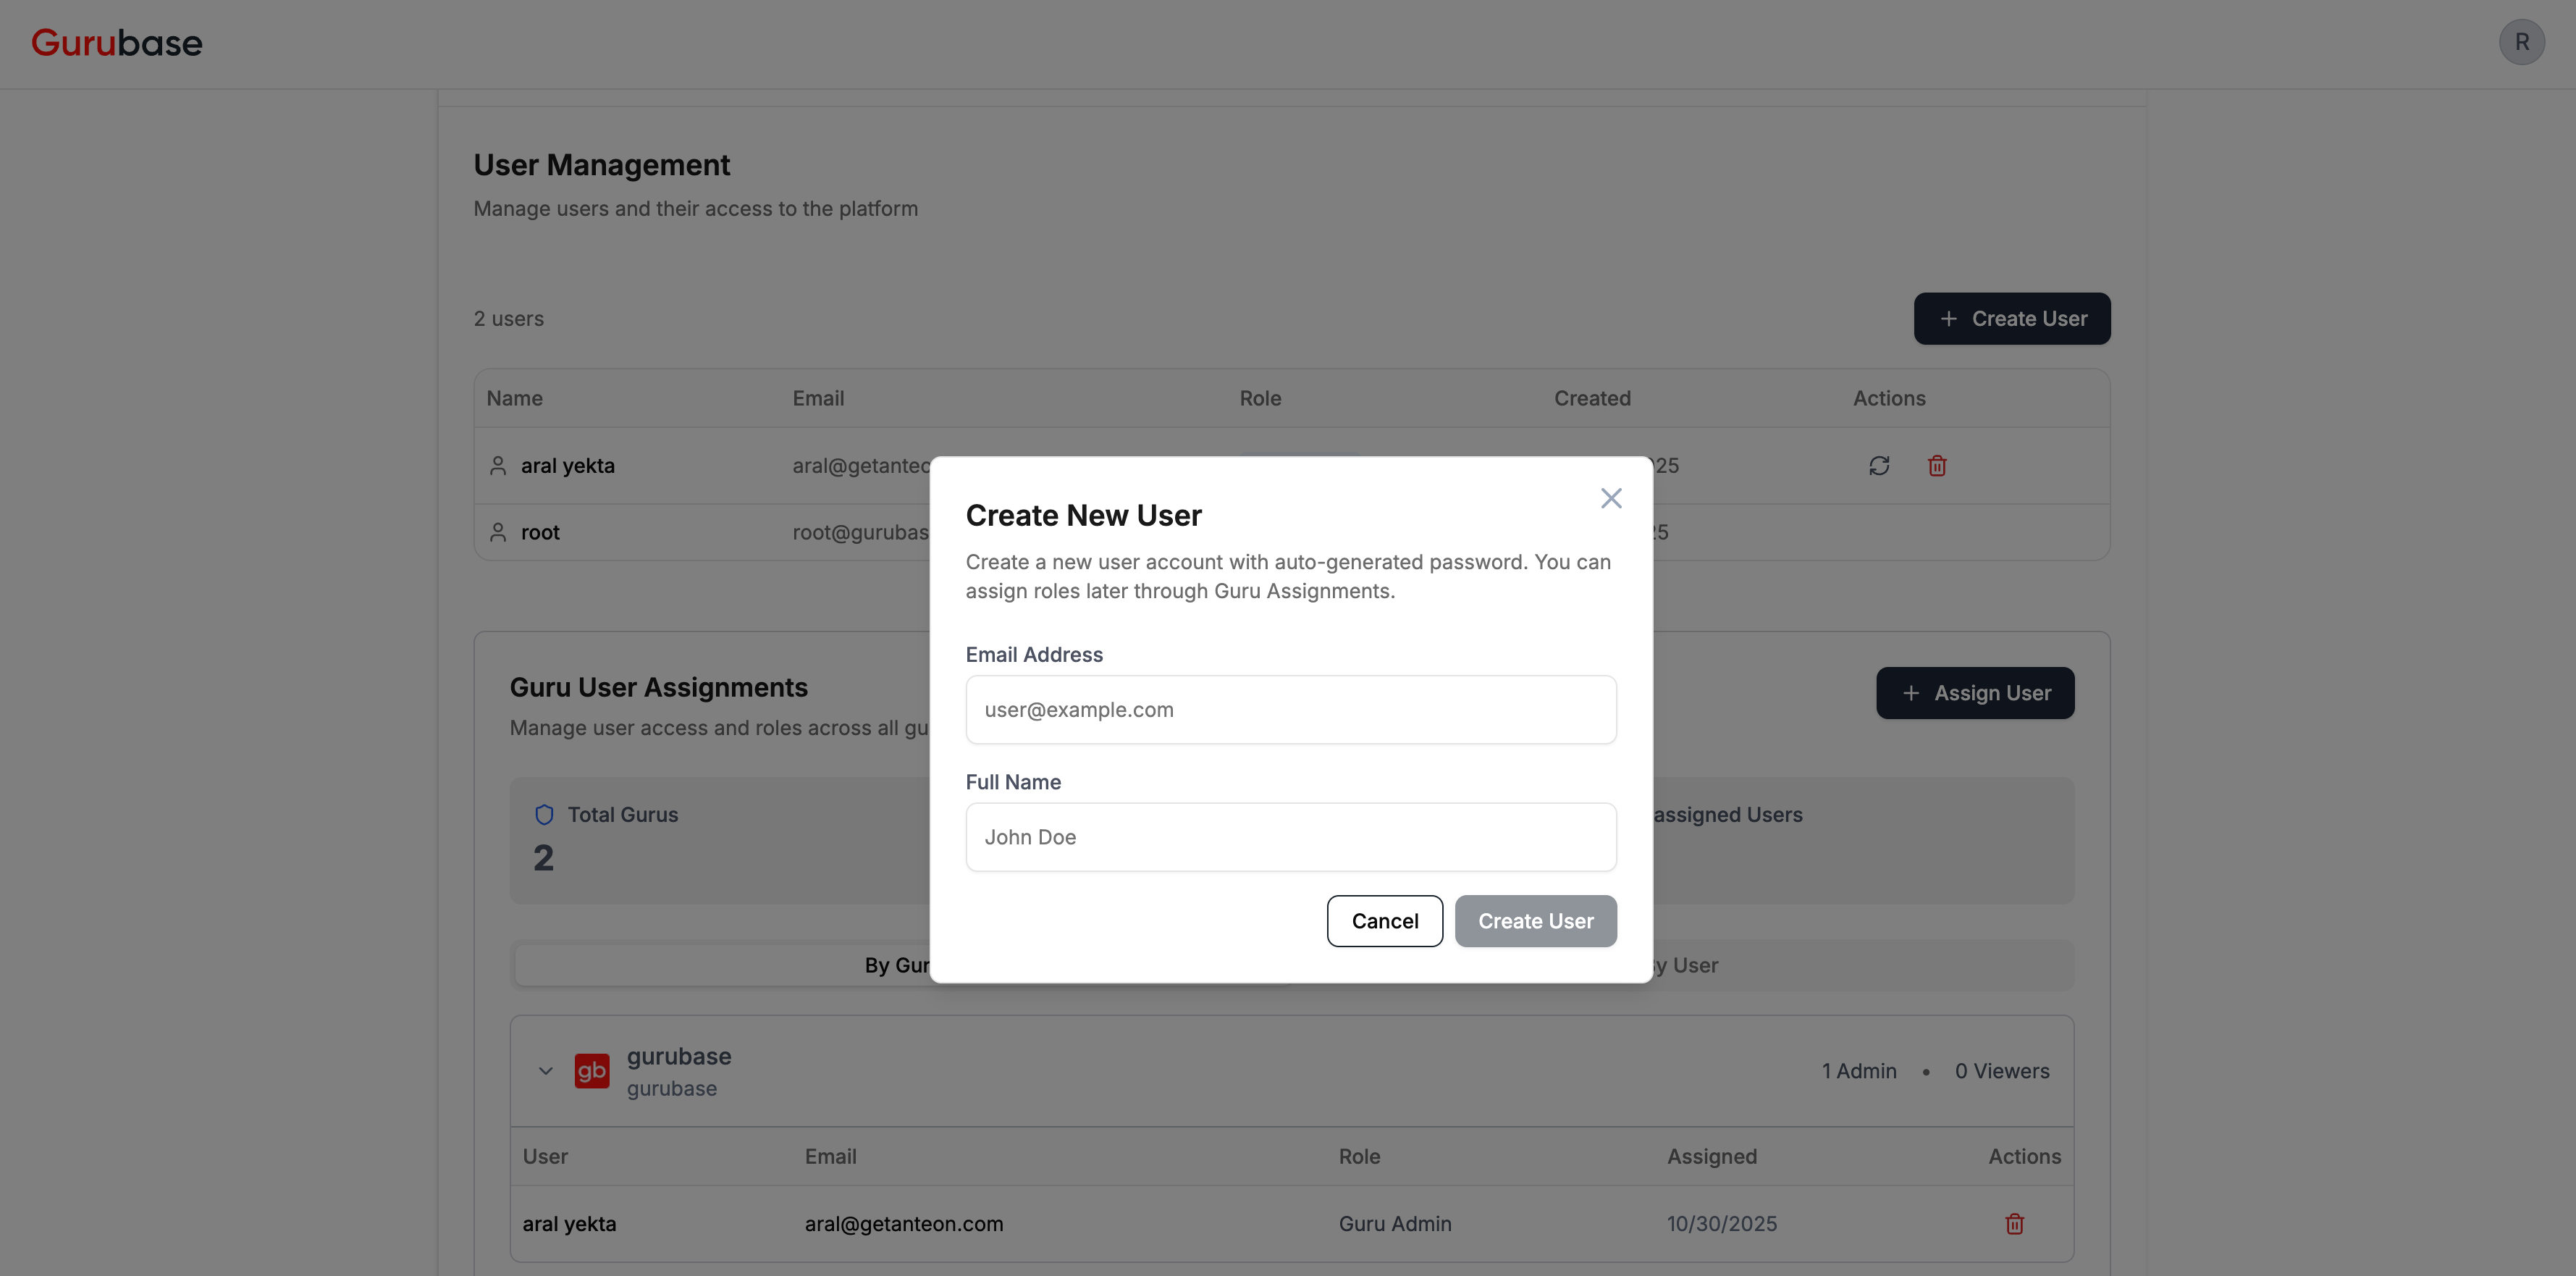 Click **+ Create User** in the User Management section.
Enter the user's email address and full name.
A random password is auto-generated. The user will be prompted to set their
own password on first login.
### Assigning Users to Gurus
Click **+ Create User** in the User Management section.
Enter the user's email address and full name.
A random password is auto-generated. The user will be prompted to set their
own password on first login.
### Assigning Users to Gurus
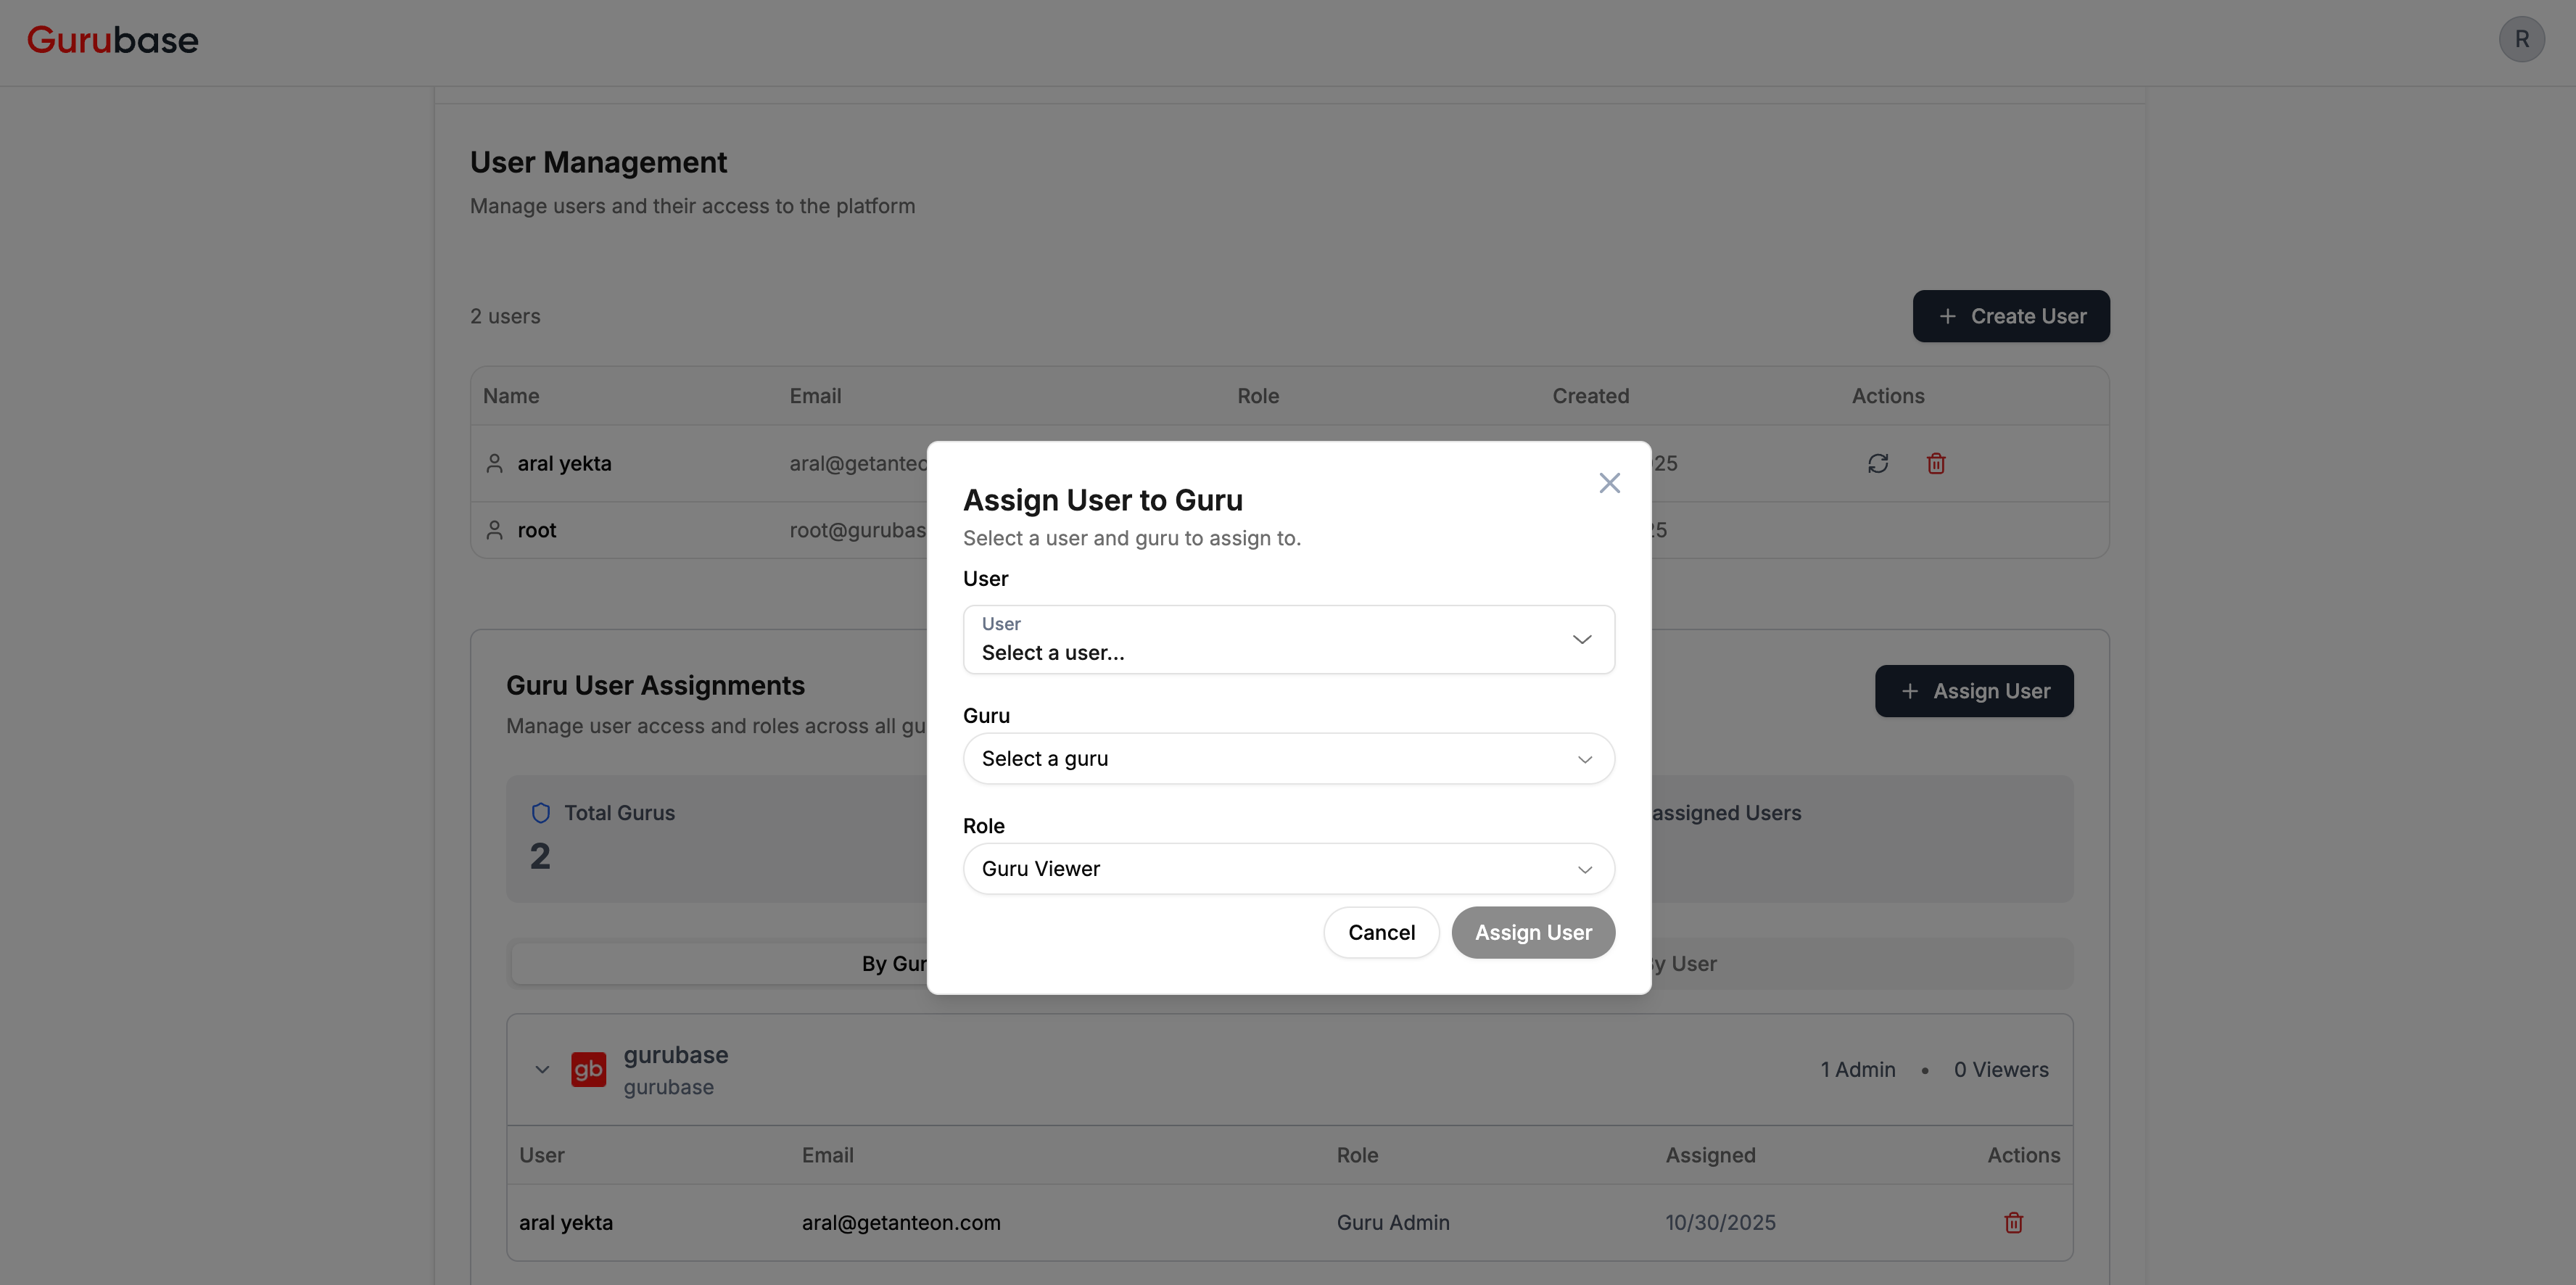 Click **+ Assign User** in the Guru User Assignments section.
Choose the user and the Guru to grant access to.
Select **Guru Admin** (can modify) or **Guru Viewer** (read-only).
### User Actions
| Action | Description |
| ------------------ | ---------------------------------------------------------------------- |
| **Reset Password** | Generate a new random password. User must set their own on next login. |
| **Delete User** | Permanently remove the user from the platform. |
***
## Next Steps
Track user actions and API calls
Monitor how users interact with your Guru
Click **+ Assign User** in the Guru User Assignments section.
Choose the user and the Guru to grant access to.
Select **Guru Admin** (can modify) or **Guru Viewer** (read-only).
### User Actions
| Action | Description |
| ------------------ | ---------------------------------------------------------------------- |
| **Reset Password** | Generate a new random password. User must set their own on next login. |
| **Delete User** | Permanently remove the user from the platform. |
***
## Next Steps
Track user actions and API calls
Monitor how users interact with your Guru