> ## Documentation Index
> Fetch the complete documentation index at: https://docs.gurubase.ai/llms.txt
> Use this file to discover all available pages before exploring further.
# Zendesk Data Ingestion
> Import Zendesk tickets and help center articles as knowledge sources
Turn your Zendesk history into AI knowledge. Import resolved tickets, help center articles, and attachments so your Guru can answer questions based on real support conversations and documentation.
## Why Ingest Zendesk Data?
Your resolved tickets contain answers to questions that will come up again
Keep your Guru updated with your latest help center articles
Images and text files attached to tickets are indexed too
Backfill jobs automatically import new content on a schedule
## What Gets Indexed
| Content Type | What's Included |
| --------------- | -------------------------------------------------- |
| **Tickets** | Ticket body, all comments, resolution notes |
| **Articles** | Full article content from help center |
| **Attachments** | Images and text files attached to tickets/articles |
| **Metadata** | Ticket status, tags, and dates for context |
**Self-hosted:** This integration is in beta for selected users.
**Cloud:** Available to all users.
***
## Setup
1. Go to your Zendesk API settings:
```
https://{your-subdomain}.zendesk.com/admin/apps-integrations/apis/zendesk-api/settings/tokens
```
2. Click **Add API token**
3. Copy the token
Go to **Gurubase Dashboard** → Select your Guru → **Integrations** → **Ingestions** → **Zendesk**
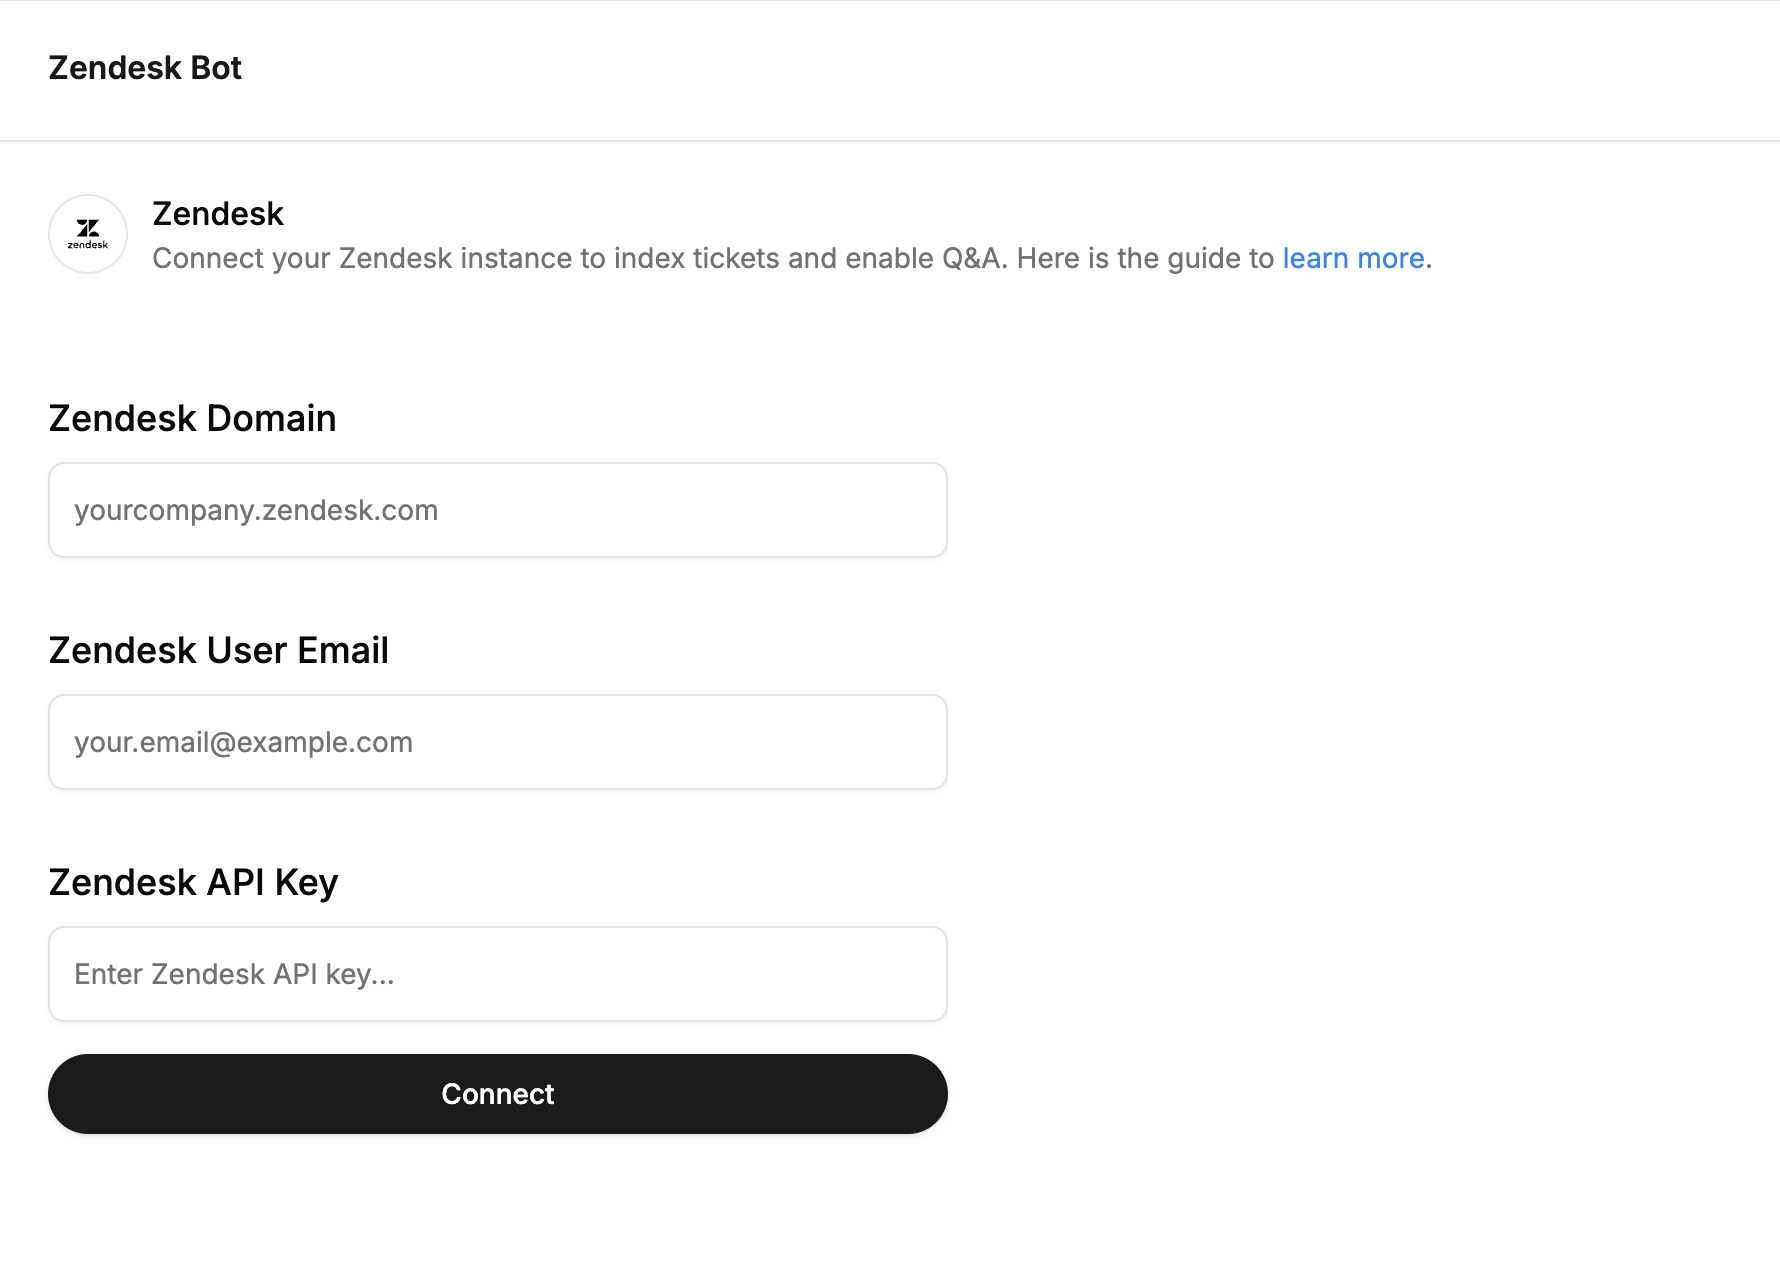
Fill in the connection details:
| Field | Value |
| -------------- | ----------------------------------------------------- |
| **Domain** | Your Zendesk domain (e.g., `yourcompany.zendesk.com`) |
| **User Email** | Your Zendesk account email |
| **API Token** | The token you created in Step 1 |
 ***
## Adding Zendesk Content
After connecting, you can import content in two ways:
***
## Adding Zendesk Content
After connecting, you can import content in two ways:
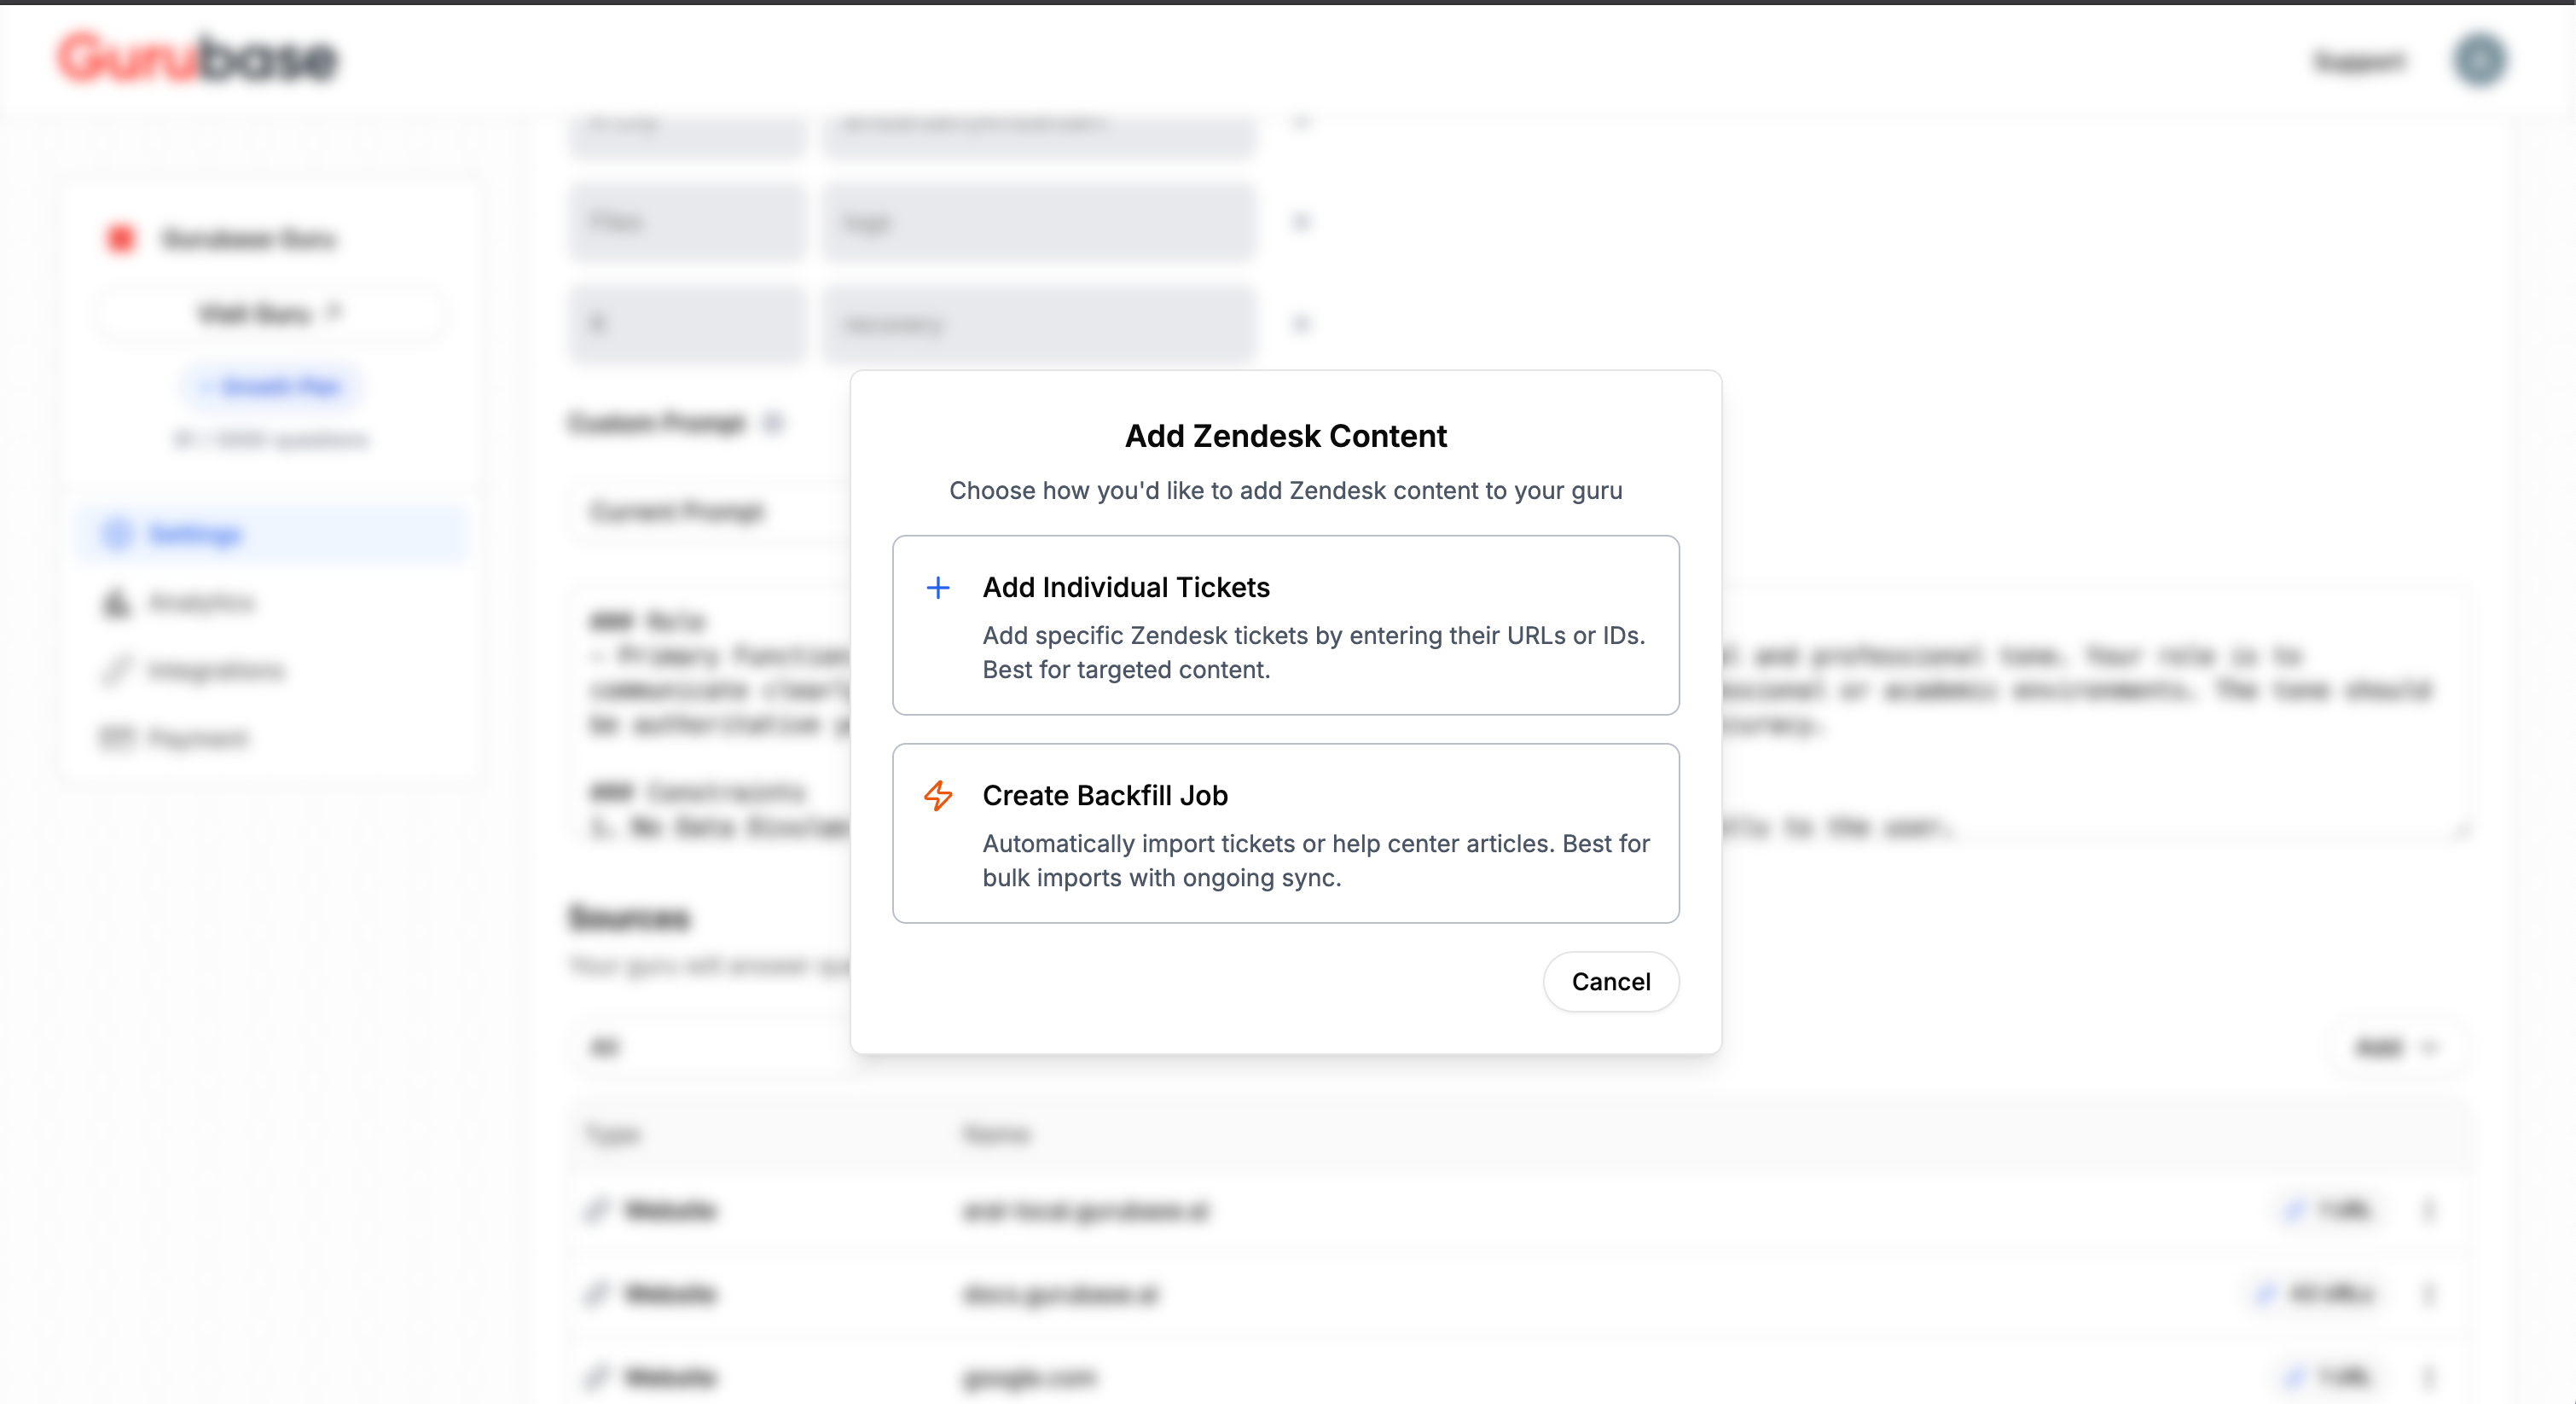 ### Option 1: Add Individual Tickets/Articles
Best for importing specific tickets or articles by URL.
### Option 1: Add Individual Tickets/Articles
Best for importing specific tickets or articles by URL.
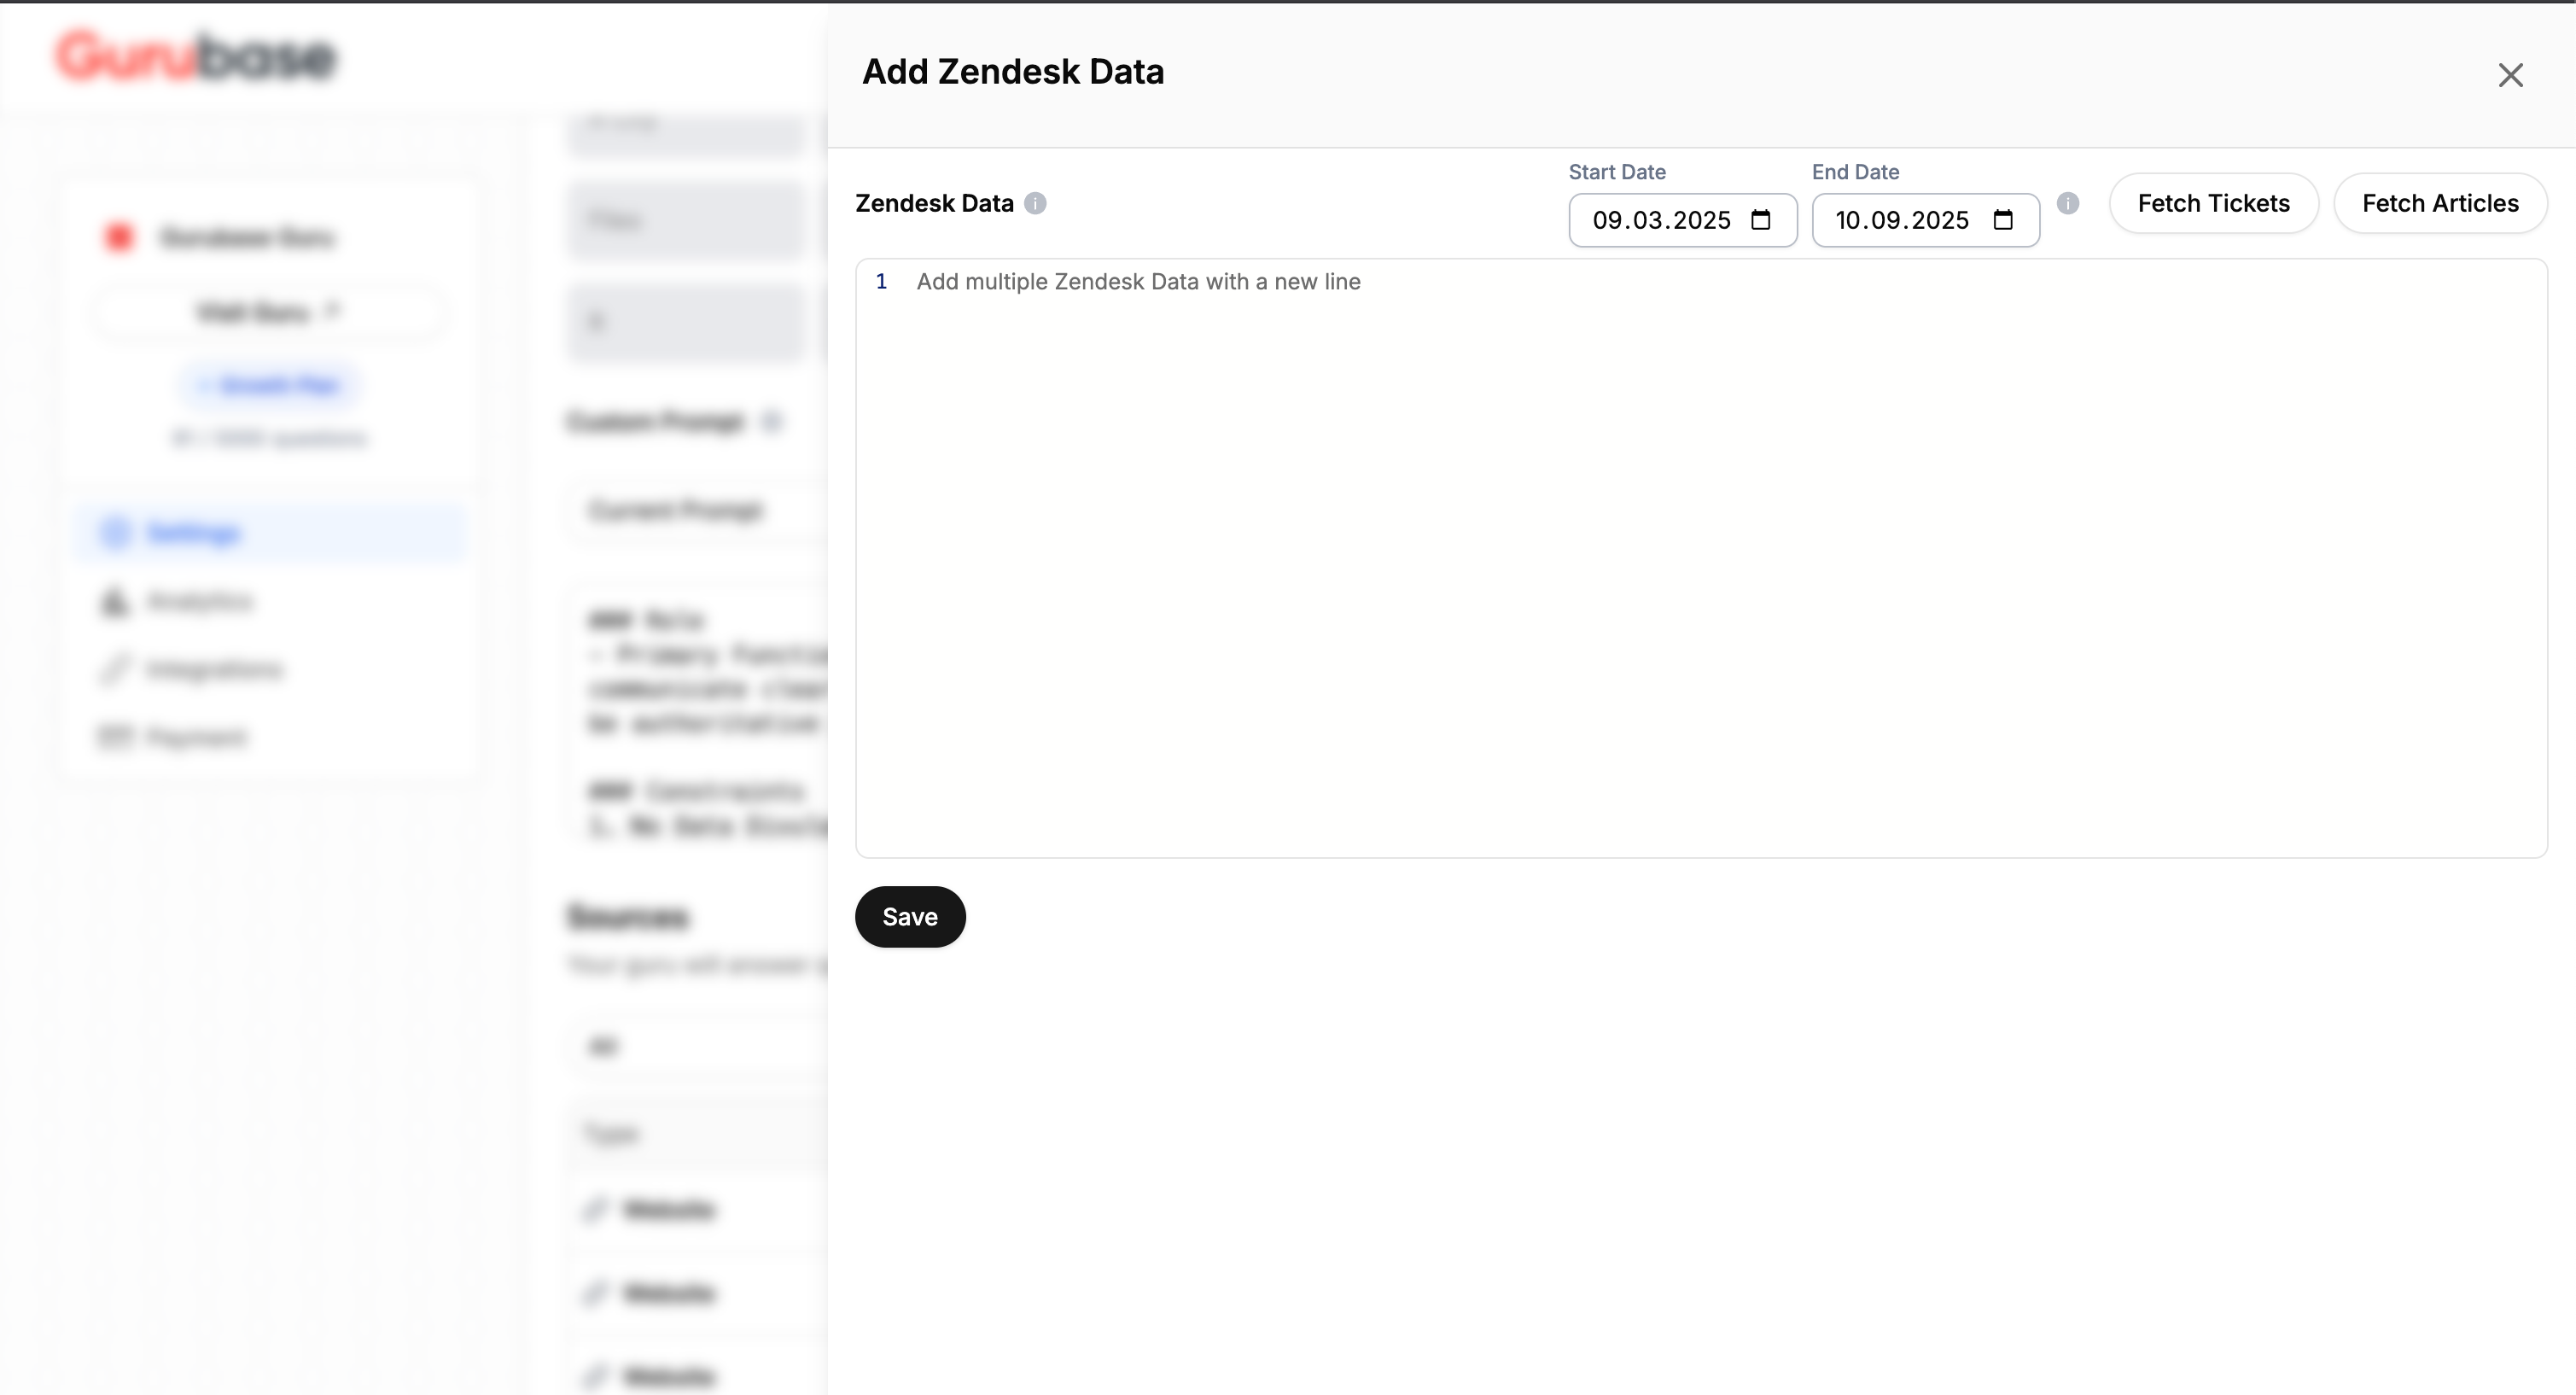 | Setting | Description |
| ---------------- | ------------------------------------------ |
| **Content Type** | Choose "Fetch Tickets" or "Fetch Articles" |
| **URLs** | Enter ticket or article URLs, one per line |
| **Date Range** | Optionally filter by creation date |
### Option 2: Create Backfill Job
Best for bulk imports and automatic ongoing sync.
| Setting | Description |
| ---------------- | ------------------------------------------ |
| **Content Type** | Choose "Fetch Tickets" or "Fetch Articles" |
| **URLs** | Enter ticket or article URLs, one per line |
| **Date Range** | Optionally filter by creation date |
### Option 2: Create Backfill Job
Best for bulk imports and automatic ongoing sync.
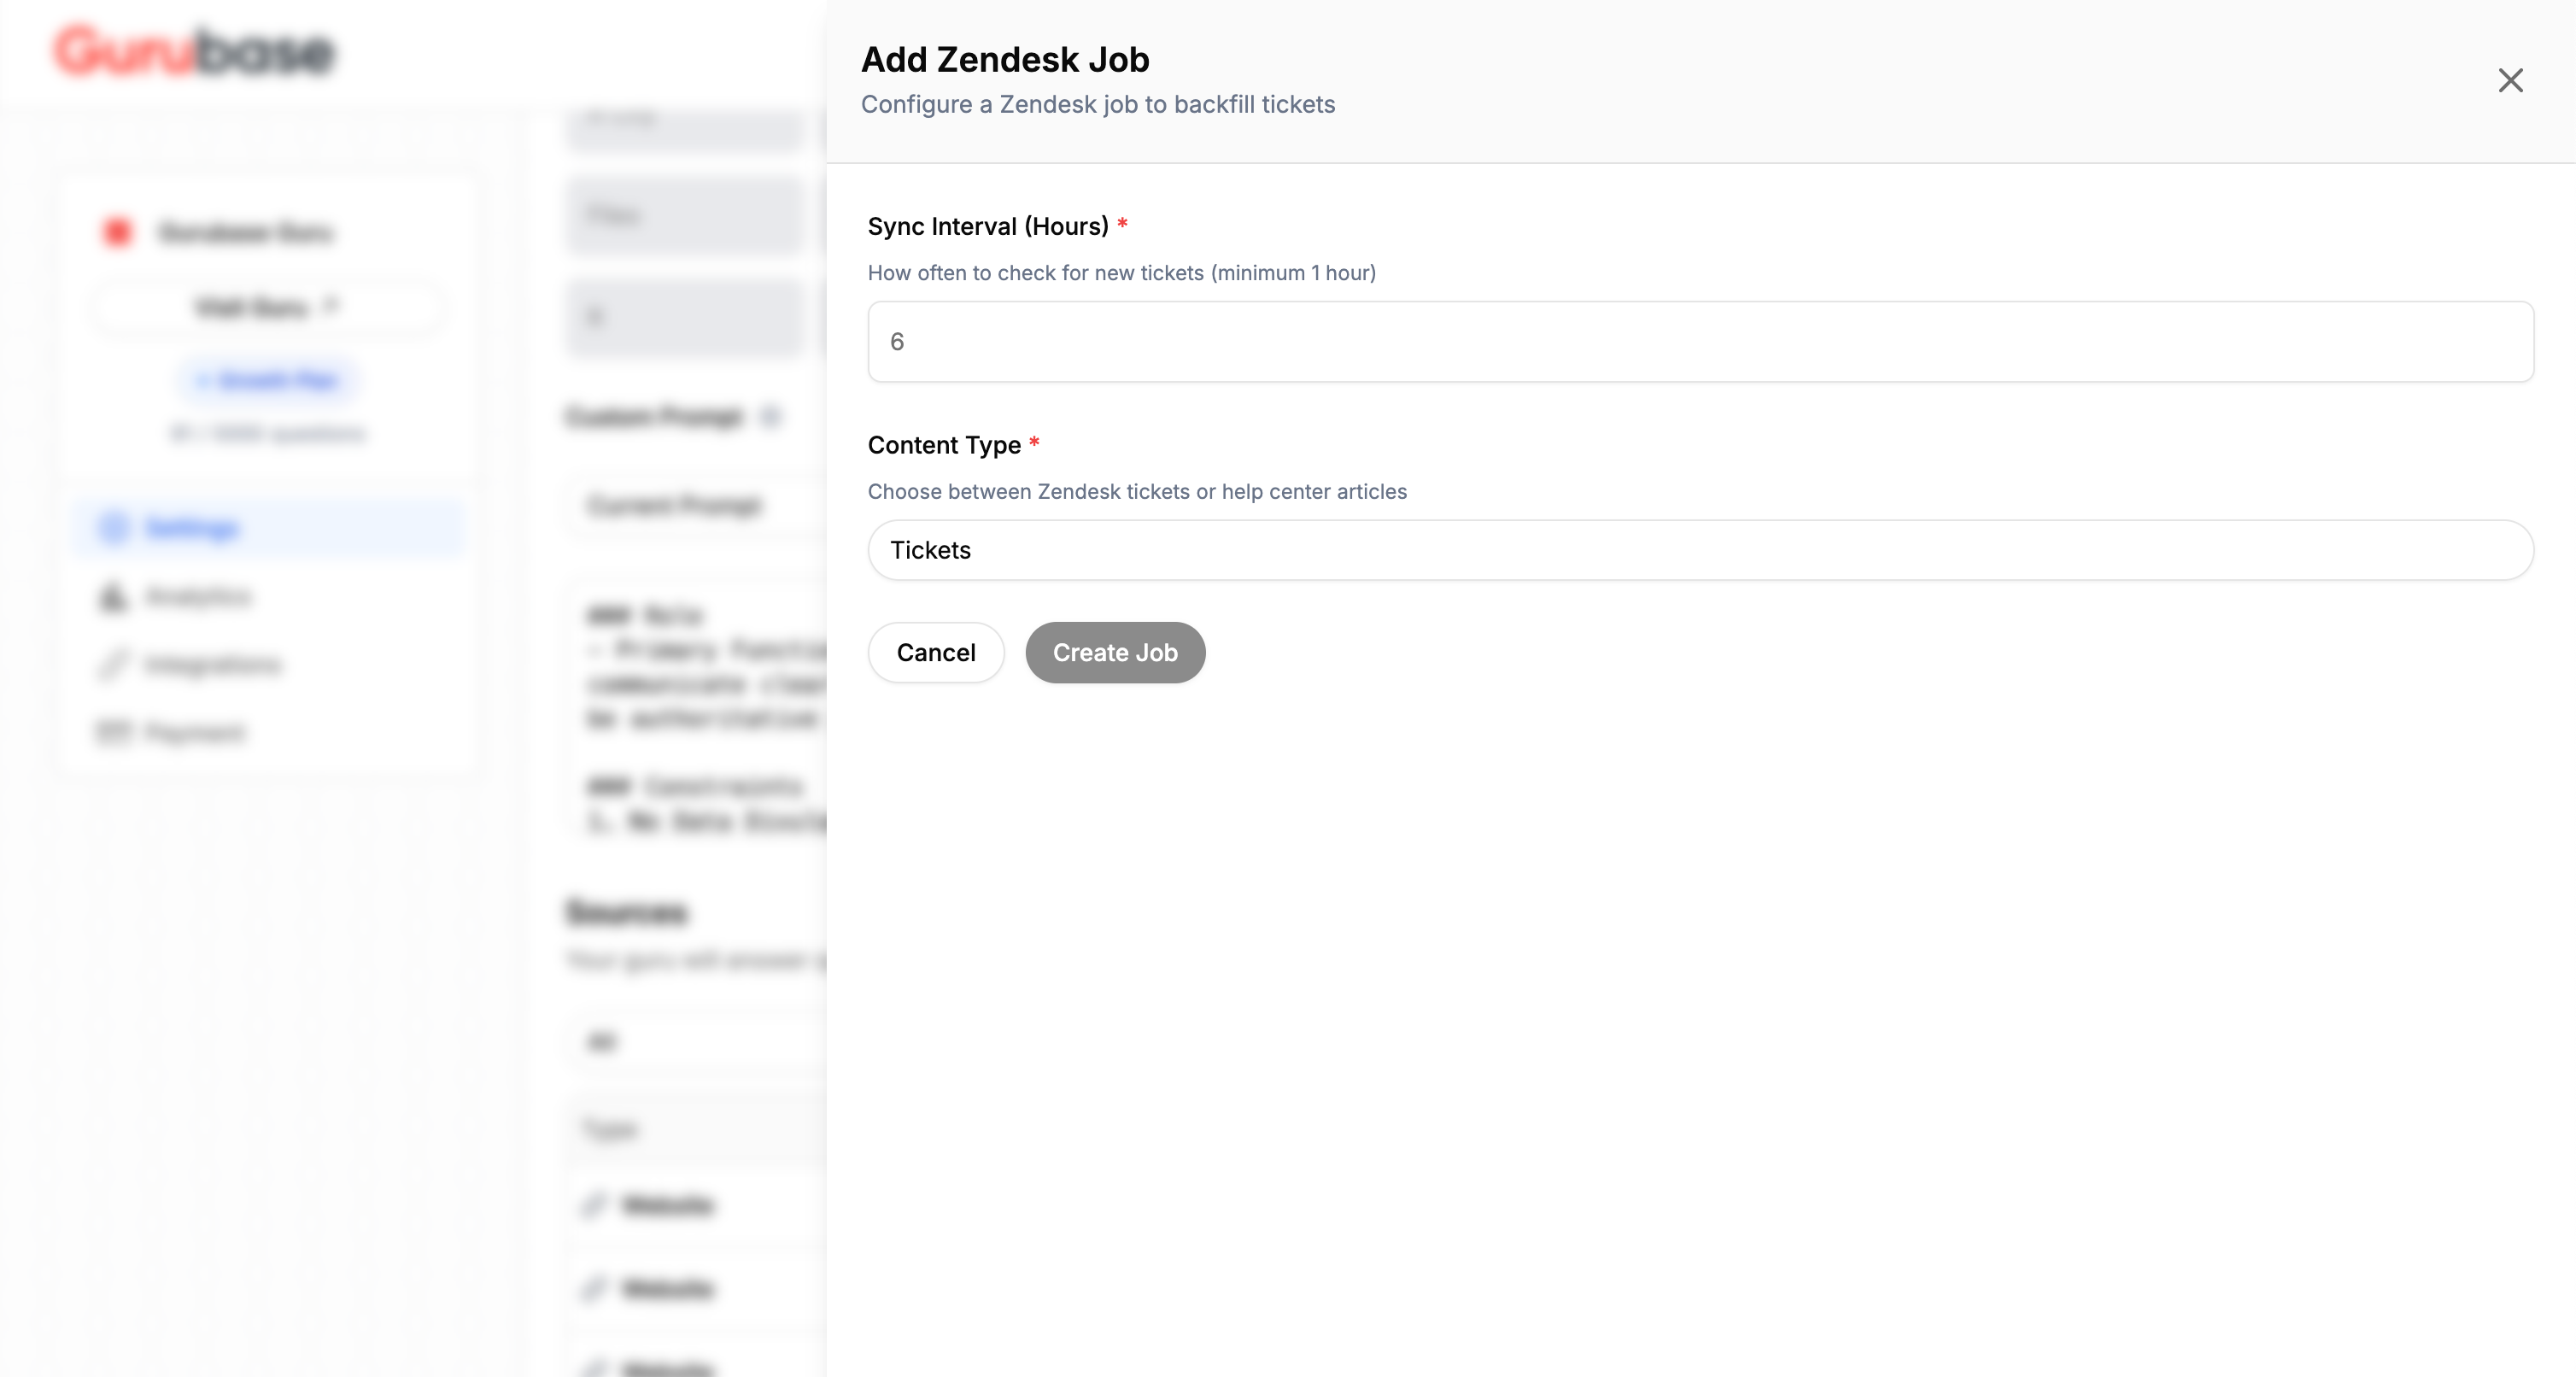 | Setting | Description |
| ----------------- | --------------------------------------------------- |
| **Content Type** | Tickets or Help Center articles |
| **Sync Interval** | How often to check for new content (minimum 1 hour) |
| **Sync Now** | Manually trigger an immediate sync |
Use backfill jobs to keep your Guru automatically updated with new resolved tickets and published articles.
***
## Viewing Indexed Content
Imported tickets and articles appear as individual sources in your Guru's data sources list. You can:
* View the exact content that was indexed
* Remove specific tickets or articles
* Check when content was last synced
***
## Next Steps
Deploy Gurubase as a Zendesk app for agents
Import Jira tickets as knowledge sources
Import Confluence pages
Add more knowledge sources
| Setting | Description |
| ----------------- | --------------------------------------------------- |
| **Content Type** | Tickets or Help Center articles |
| **Sync Interval** | How often to check for new content (minimum 1 hour) |
| **Sync Now** | Manually trigger an immediate sync |
Use backfill jobs to keep your Guru automatically updated with new resolved tickets and published articles.
***
## Viewing Indexed Content
Imported tickets and articles appear as individual sources in your Guru's data sources list. You can:
* View the exact content that was indexed
* Remove specific tickets or articles
* Check when content was last synced
***
## Next Steps
Deploy Gurubase as a Zendesk app for agents
Import Jira tickets as knowledge sources
Import Confluence pages
Add more knowledge sources